Receiving emails
To centralise your support emails in Plain, you'll need to forward messages from your support address (like support@example.com) to your Plain workspace's inbound address. Once set up, every customer email will appear in Plain as a thread – complete with structured workflows, assignments, and SLAs.
CC'd recipients on inbound emails are not currently displayed in the Plain UI or preserved on outbound replies. If you need to keep other parties in the loop, consider using BCC email addresses or reaching out to us at support@plain.com.
Setting up your support email address
What you will need
Your support email address (e.g.
support@example.com)Your Plain inbound email address (e.g.
abcdefg@inbound.postmark.app)Admin access to your company's email provider or domain registrar
You can find your inbound email address in Settings → Email in your Plain workspace.
If you use Google Workspaces
Open this link in your Admin Console.
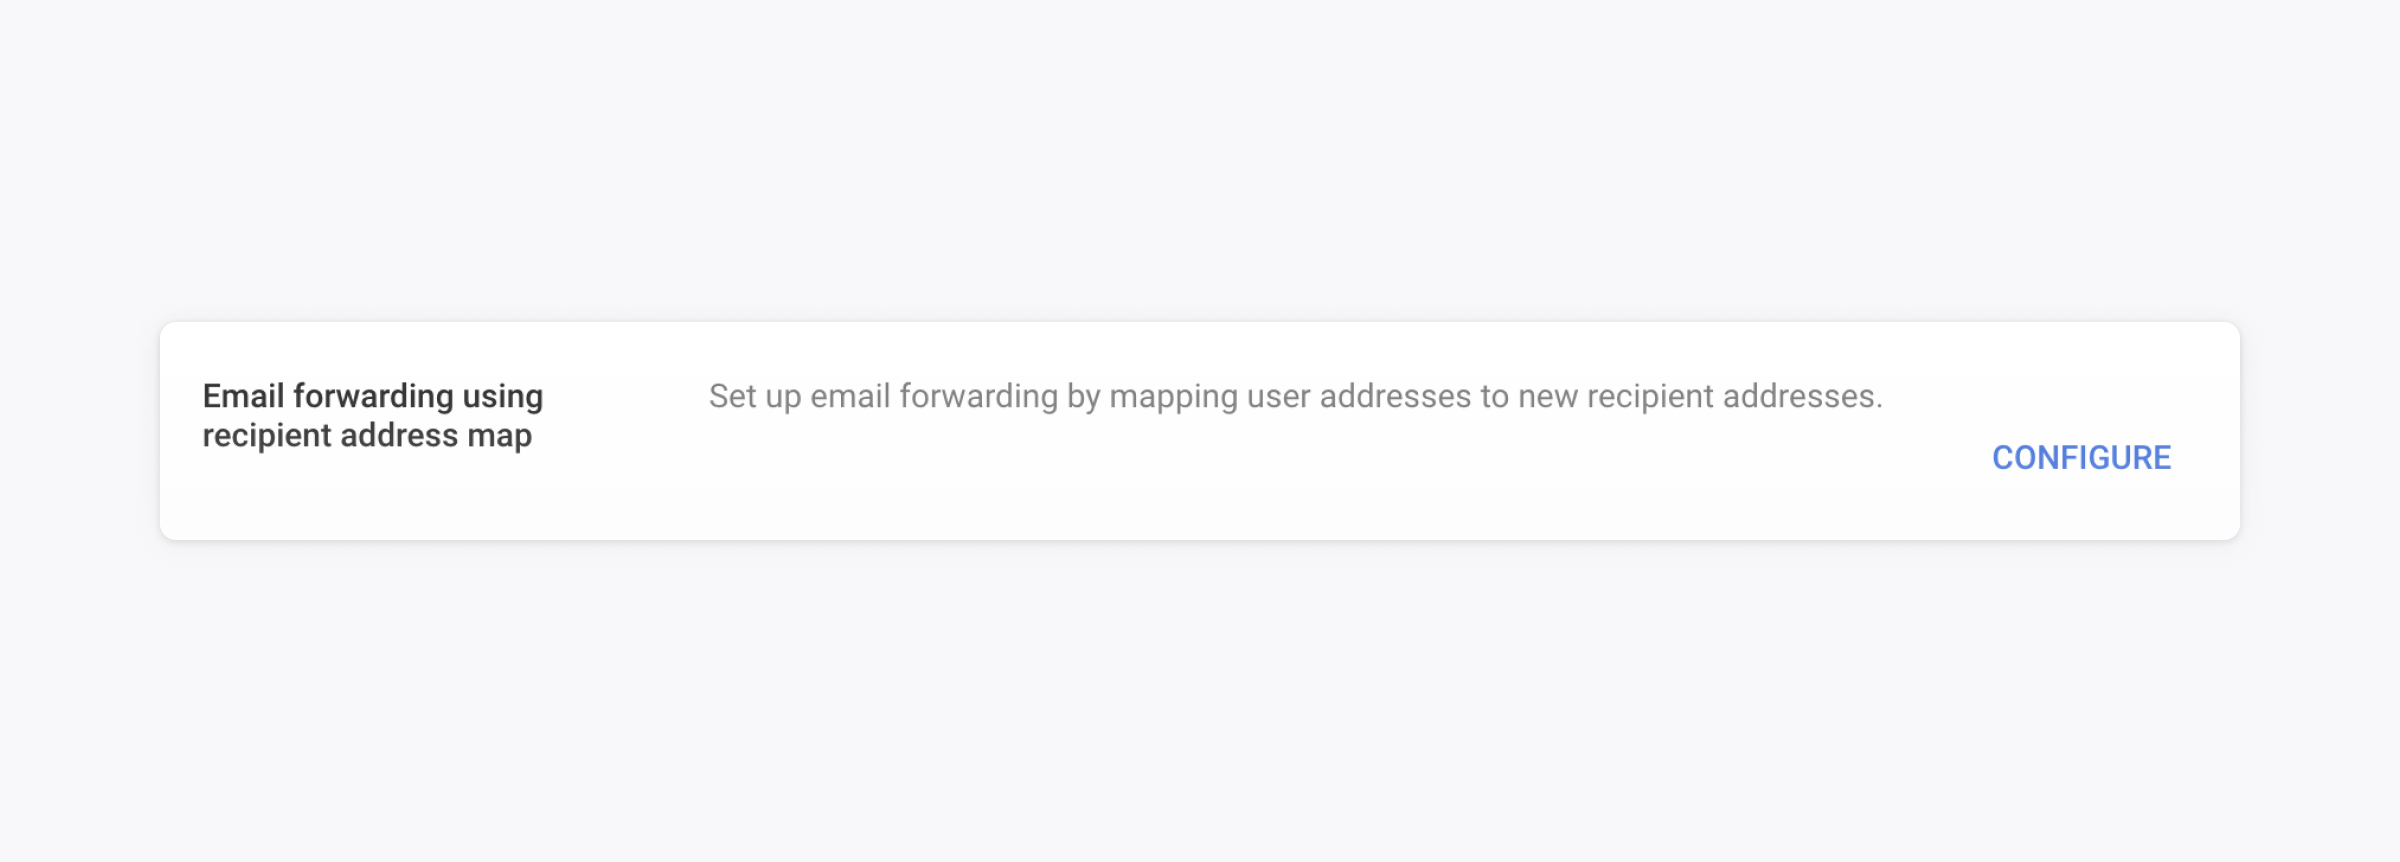
Click on 'Email forwarding using recipient address map', then 'CONFIGURE' or 'ADD ANOTHER RULE'
Configure the forwarding rule
Pick a name for the forwarding rule. For instance:
Plain forwardingEnter your support email under 'Address' (e.g.
support@example.com)Enter your Plain inbound email address under 'Map to address' (e.g.
abcdefg@inbound.postmarkapp.com)Choose 'All incoming messages' under 'Messages affected'
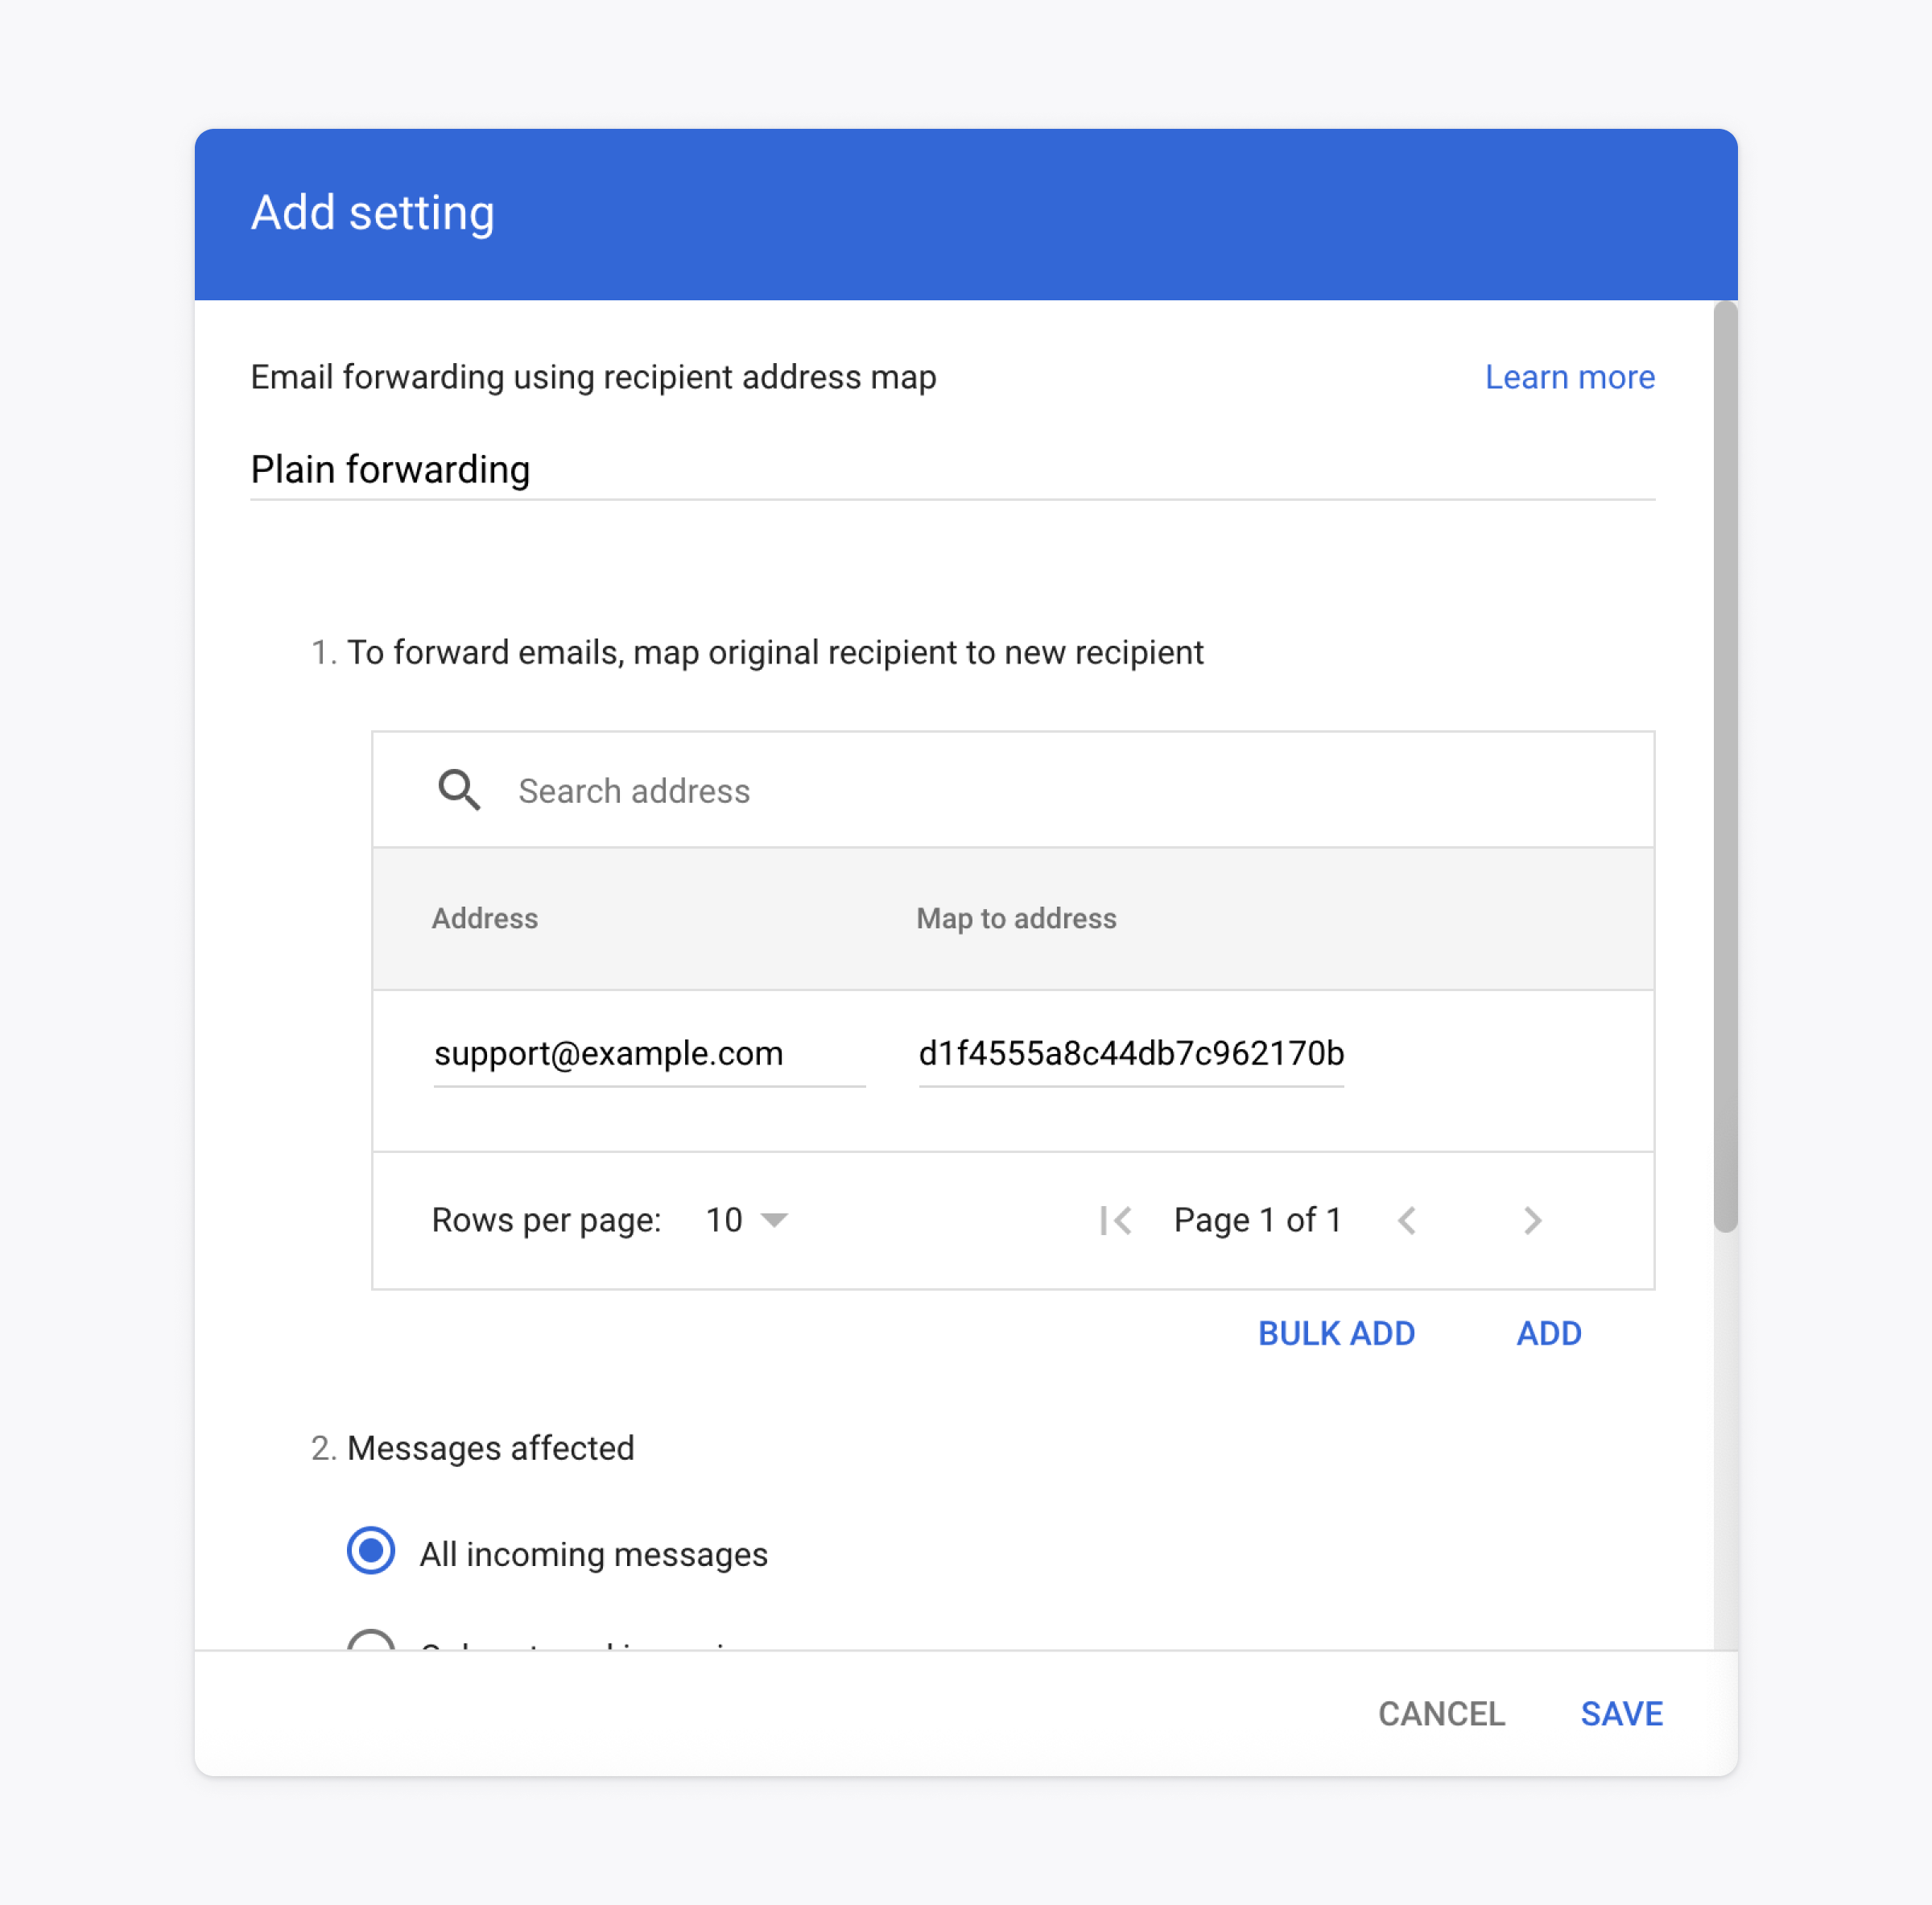
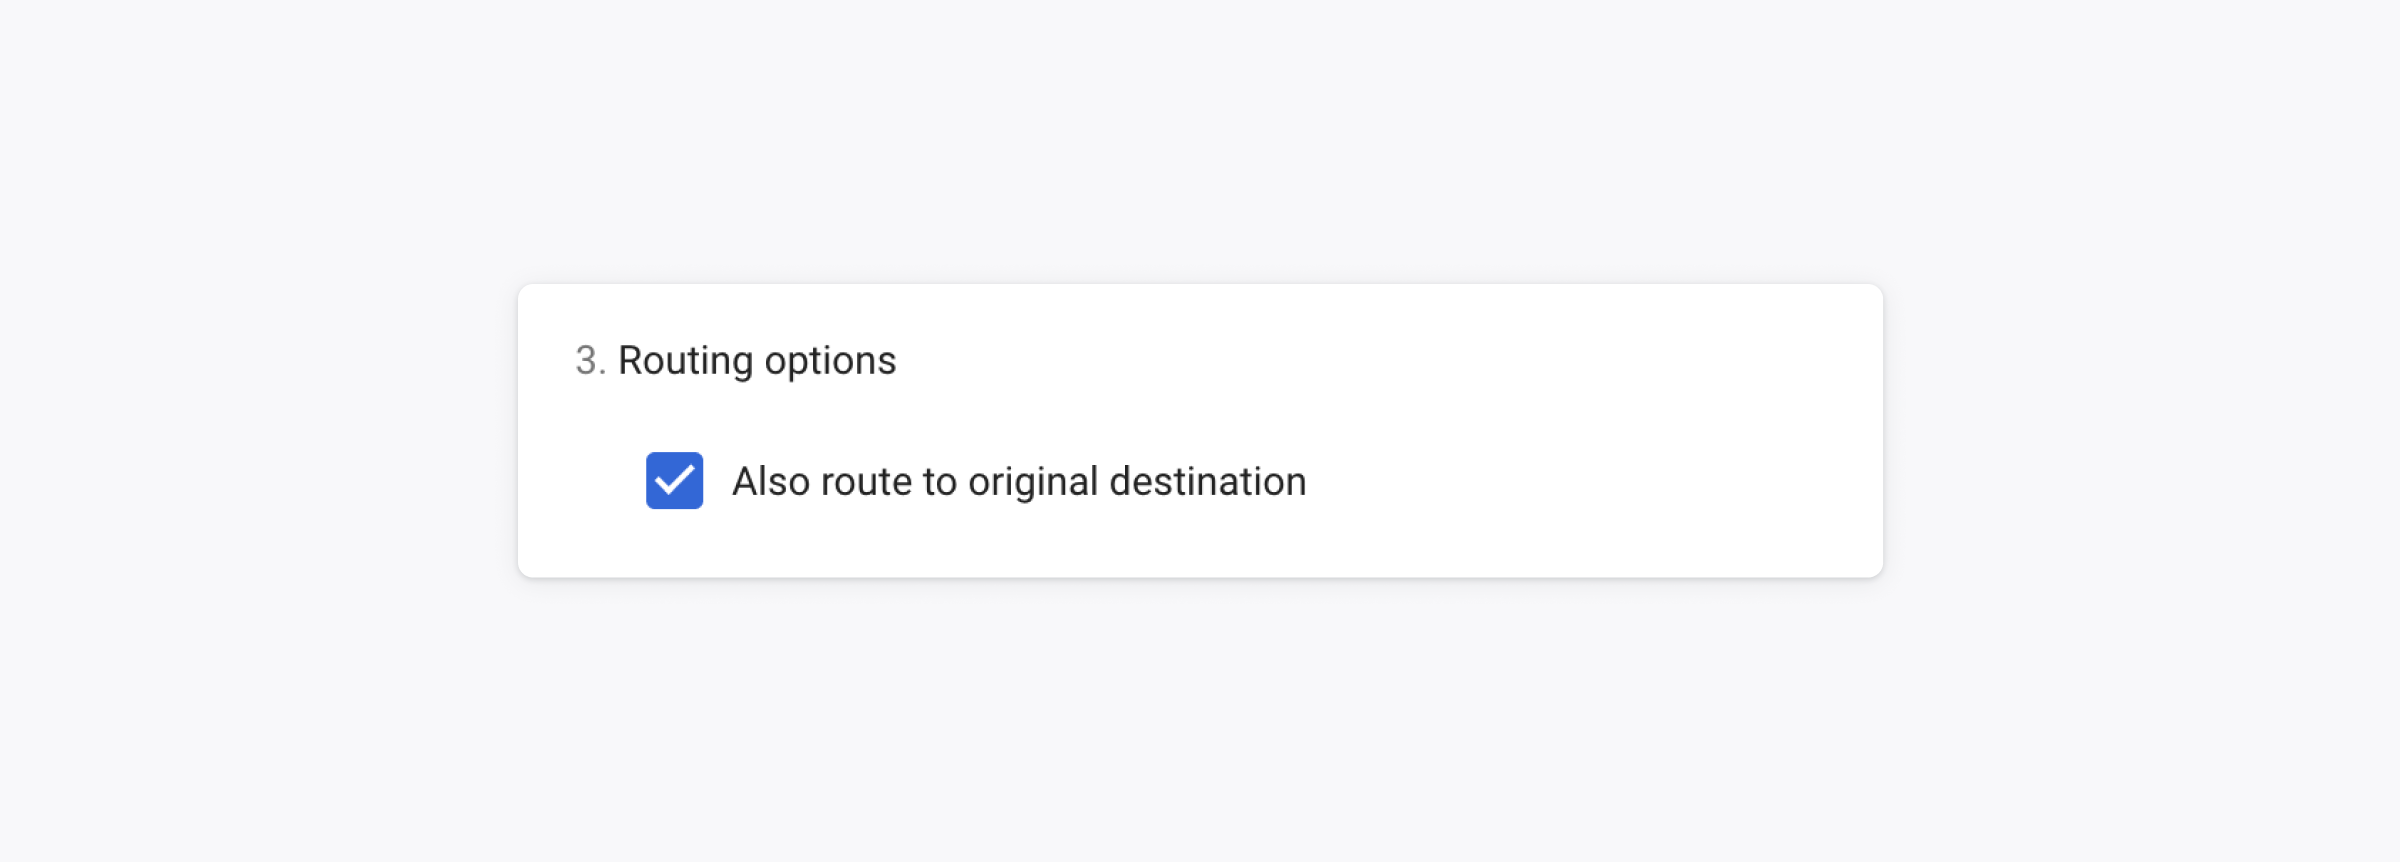
If you still want all emails delivered into your support email address' own inbox, check the box 'Also route to original destination'. See the section 'How to keep a copy of all emails you see on Plain' if you need more control over this.
Check this option if your support email address points to a Google Group and you still want to receive all inbound support emails in the group.
Click 'SAVE'
How to keep a copy of all emails you see on Plain
These instructions apply even if your support email address points to a Google Group
We recommend having a separate email address to use as an archive. For instance: support.archive@example.com
Go to your Google Workspace Default Routing Gmail settings
Click on 'CONFIGURE' or 'ADD ANOTHER RULE'
Under 'Specify envelope recipients to match', choose 'Single recipient' and write your support email address (e.g.
support@example.com)Scroll down, tick 'Add more recipients' under 'Also deliver to'. Now click on 'ADD' and type the email address where you want to keep emails in (e.g.
support.archive@example.com)Click 'SAVE'
Scroll down and click on 'Perform this action on non-recognised and recognised addresses'
Click 'SAVE'
By following these steps, all inbound emails to support@example.com will end up in support.archive@example.com (as well as in Plain)
If you also want to keep track of all outbound emails, get in touch with us at support@plain.com. We will automatically add support.archive@example.com to all your outbound emails as a hidden recipient (BCC)
In order to avoid issues processing emails in Plain, always choose a different address for your archive.
If you don't use Google Workspaces
No problem – forwarding can be set up through:
Your domain registrar (e.g. DNSimple, Namecheap)
Your email provider (e.g. Microsoft 365)
If you need help configuring this, get in touch – we're happy to assist.
How we detect potentially spoofed emails
When we receive an email, we run technical authentication checks to estimate whether it was really sent by the address it claims to come from.
We classify each email as PASS, FAIL, or UNKNOWN.
In order to do so, we first read the results of SPF, DKIM, DMARC, and related forwarding checks from the email headers. If those check results are missing or not conclusive, we then use additional input from a leading email spam platform as a fallback signal.
A FAIL means the checks strongly suggest the sender could be spoofed. UNKNOWN means we don't have enough reliable data to make a confident decision either way.
For both FAIL and UNKNOWN, we show a warning banner so your team can handle the message more carefully. The safest verification step, particularly when there's a FAIL is still to reply and confirm the sender can respond from the same address/thread.